As mentioned, my wife Tricia had fallen down the second-floor-to-first-floor-stairs. We needed to add another handrail to these stairs.
It needed to go on the wall side and above the chair rail here:

My previous work with the cellar handrail made it clear that this stairway needed a wooden handrail, painted white and fastened atop solid brass brackets. And the web offered abundant and helpful guidelines, especially this one from the Family Handyman website.

First, purchase the parts.
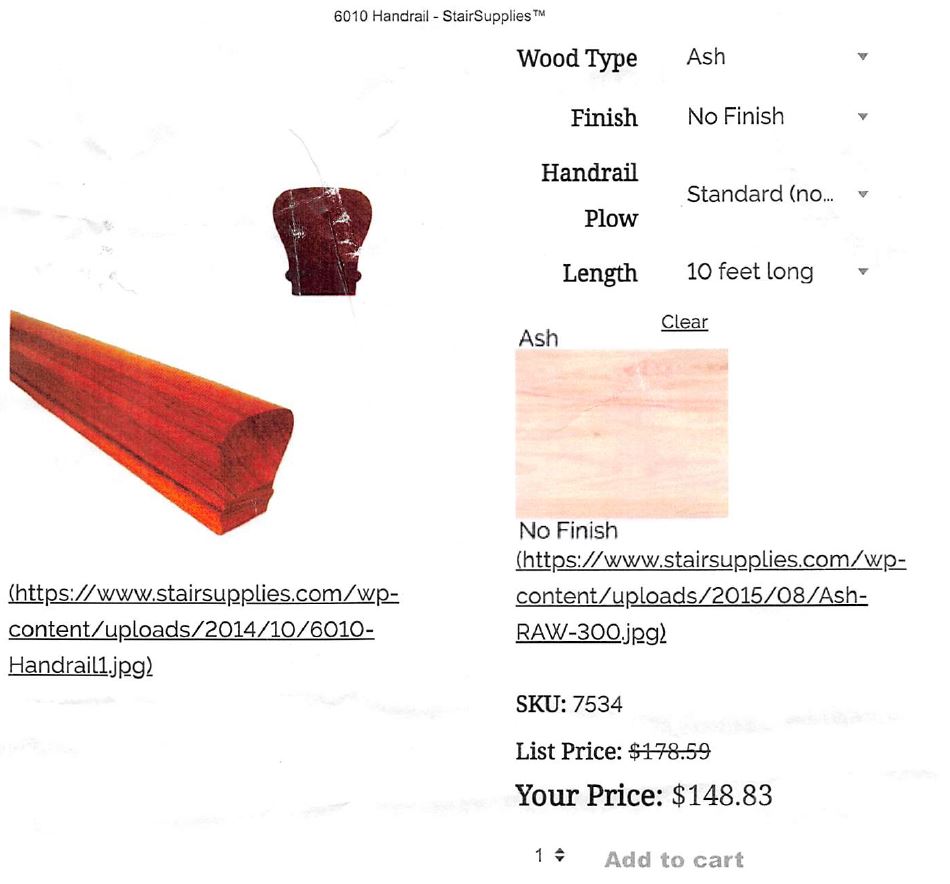
I looked on line for wood handrails with a length of at least 9′ to cover the stairway flight’s length and they needed to match the molding and shape of our existing stair’s handrails …


The web offered some options.
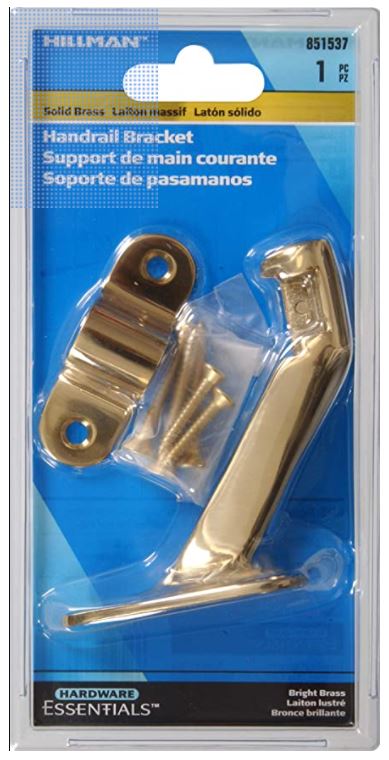
Looking at on line price and shipping costs and delivery times convinced me to try “live and local” first. I went to Hingham Lumber. They carried both the solid brass handrail brackets we wanted…
… and a selection of handrails.
They found a 12 foot ‘remaining’ portion of a full 16 foot oak rail that matched our mold. And, by lumber yard convention, they charged me only for ½ (or 8′) of the 16 foot total.

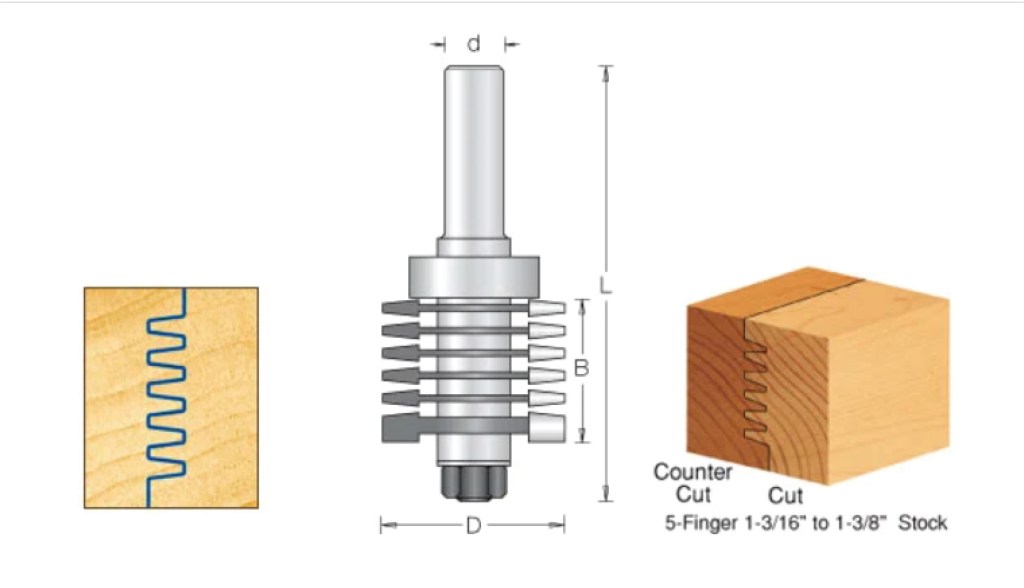
The Crown Heritage Division of the ECMD company (Wilkesboro NC) made it. They fuse multiple short lengths of oak with “finger joints” to get the full 16′ and then they shape it on a lathe.


We began by setting up the brackets.
To screw the brackets into the wall we needed to find the studs behind the wall to provide a solid base to screw them into. So we pulled out our trusty Precision Sensor Profinder 5000 (Costco for $35. / same as the Franklin Sensor ProSensor 710 but repackaged for Costco.)

It actually was the first time I had used it and it worked wonderfully after we got the hang of it.

Here the Profinder signals the location and width of the stud. From Toolguyd review,
“…When you place the stud finder on the wall over a stud, the LEDs corresponding to the position and width of the stud will light up. Then, you just slide the Profinder 5000 along the wall to find other studs.”
We marked each side of the stud with yellow stickies on the wall paper and proceeded to the next position. Then it was simply a matter of spacing the four brackets along the full length and screwing them into the wall and the stud behind it.

Cutting the Handrail “Returns”
All the “installing handrails” guides pointed out the way to cut and affix the all important “returns”.
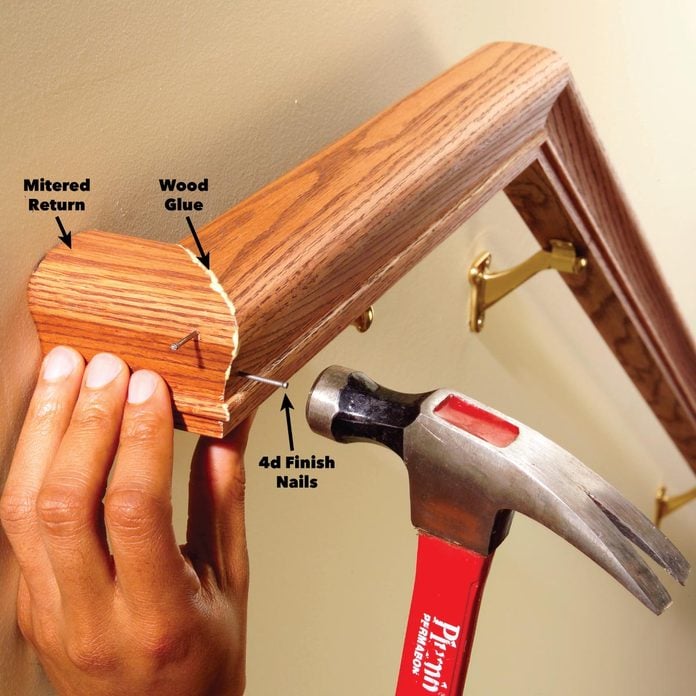
From the Family Handyman article, “…These returns are required by the building code, and for good reason. They eliminate the possibility that loose clothing or a purse strap could get hung up and cause a fall. Besides, they create a nice finished look on the ends of the stair railing. “
They instruct a.) cutting a small portion off each end of the handrail using a 45º miter cut, then b.) flipping those cut offs to the opposite ends to work as “returns” once affixed, like this:

That brought up another tool decision. Should we buy a Miter saw. We researched that quite a bit with some hemming and hawing. “Would I ever use it enough to justify buying one, or even more challenging, taking up valuable cellar space to store it?”
I came away from all that convinced that buying a Track saw with a miter guide would allow me to not only cut very exact miters but also do much more than a miter saw could. But…. not now.
For now we decided to use the Mill Work services of Hingham Lumber. This milling group would do custom cuts to order. But you needed to show up with very precise measurements and specifications to make the most of your time (you paid for cutting service in time increments) and avoid recuts.

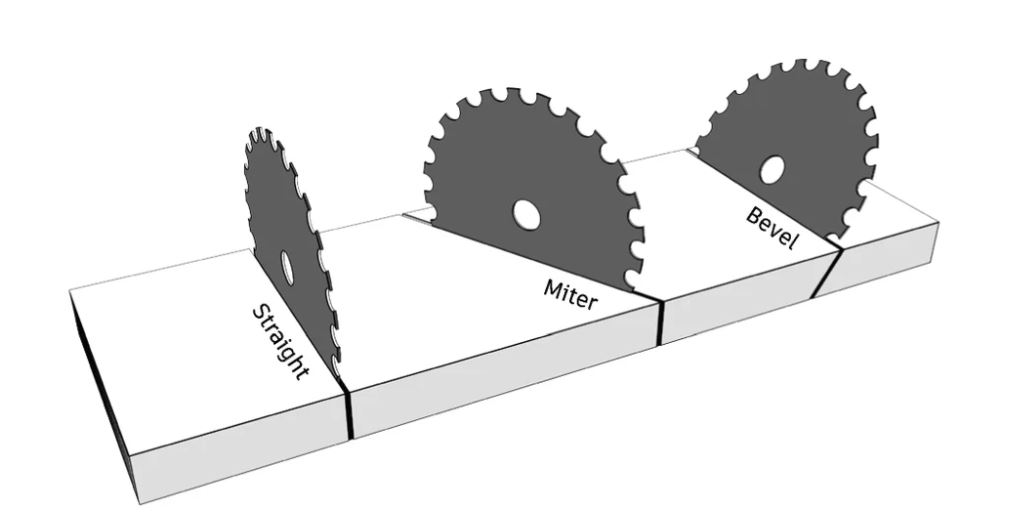
Bevel Cuts
Fine and simple for the 45º miter cuts to do the returns, but significantly more challenging for the bevel cut we needed to make the top of the handrail fit-in with the existing chair rail and look original.
To get the angle, the helpful Family Handyman article offered a simple “guess and check” … “and cut again” approach for coming up with the precise degree of bevel required:
“Set your power miter saw to cut a 16-degree angle [bevel] and saw the rail at the mark. Cut the opposite 16-degree angle on the remaining rail piece. Use it for the horizontal top section. This is an approximate angle. … Test the fit of the rail joint. Adjust the cutting angle and recut both pieces until the joint is tight. Don’t worry if you lose a little length on the rail. It’ll just reduce the distance the rail extends at the bottom, which isn’t critical. When you’re satisfied with the fit, cut….”
We could not do that back and forth using the cutting service. We had to come in with the precise bevel degree and length. But, how to get that correct precision in advance? through measuring? Step one involved capturing the bevel angle I was trying to match. Tommy of Out of the Woodwork introduced me to the key with this instructional video. In short he explained a bevel gauge and how it works.
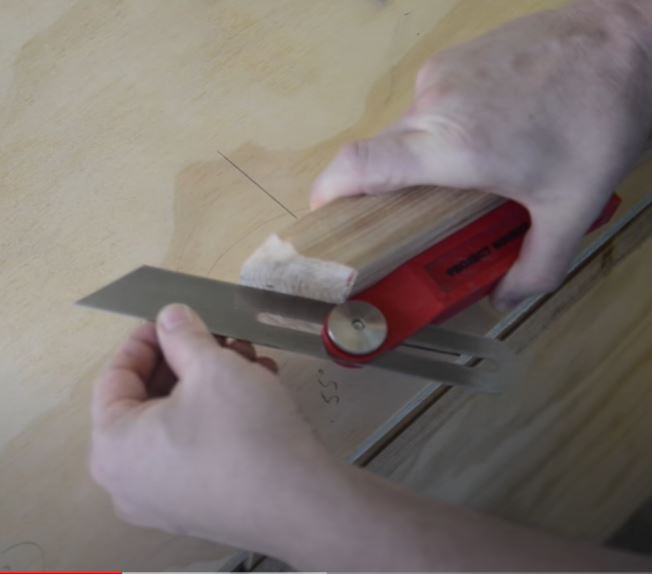
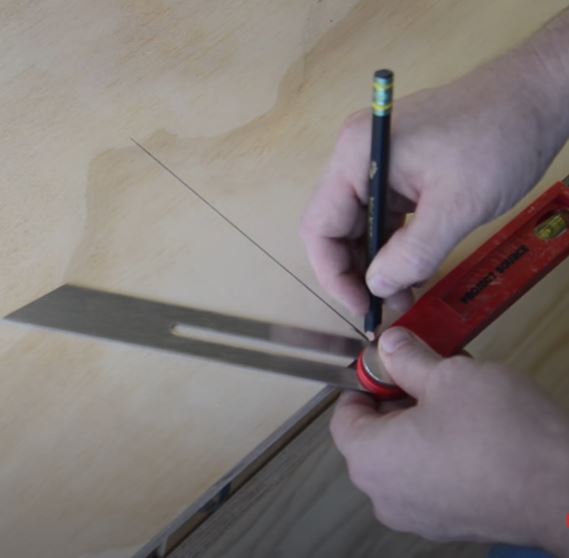
The bevel gauge allowed one to set the gauge blade to the real bevel angle “in the field” and then mark and measure that angle into your targeted cut. I got one and measured the chair rail bevel angle that I needed to match:


Then came the method to translate the bevel gauge position to specific degrees for the bevel saw. I struggled a bit with this instruction from Wood Magazine called “Bevel Basics and Beyond”. One transfers the bevel angle to paper, then gets a compass and mark two circles – one at the ; the intersection is the angle to cut and the measure can be deciphered with a simple compass:


…here’s the actual instructions sound complicated. From the Magazine:
- “Place the point of a compass at the bottom of the marked line (point B), and create points A and C by swinging an arc of any radius between 3″ and 5”. Use a sharp lead for the best accuracy.
- With the radius of the compass unchanged, place the point at C and swing another arc.
- Move the point of the compass to point A and swing an arc just as you did in Step 2. The intersection of these two arcs creates point D. With a straightedge, draw a line from point B through point D to create the bisect line.”
My drawing with lots of markup looked like this:
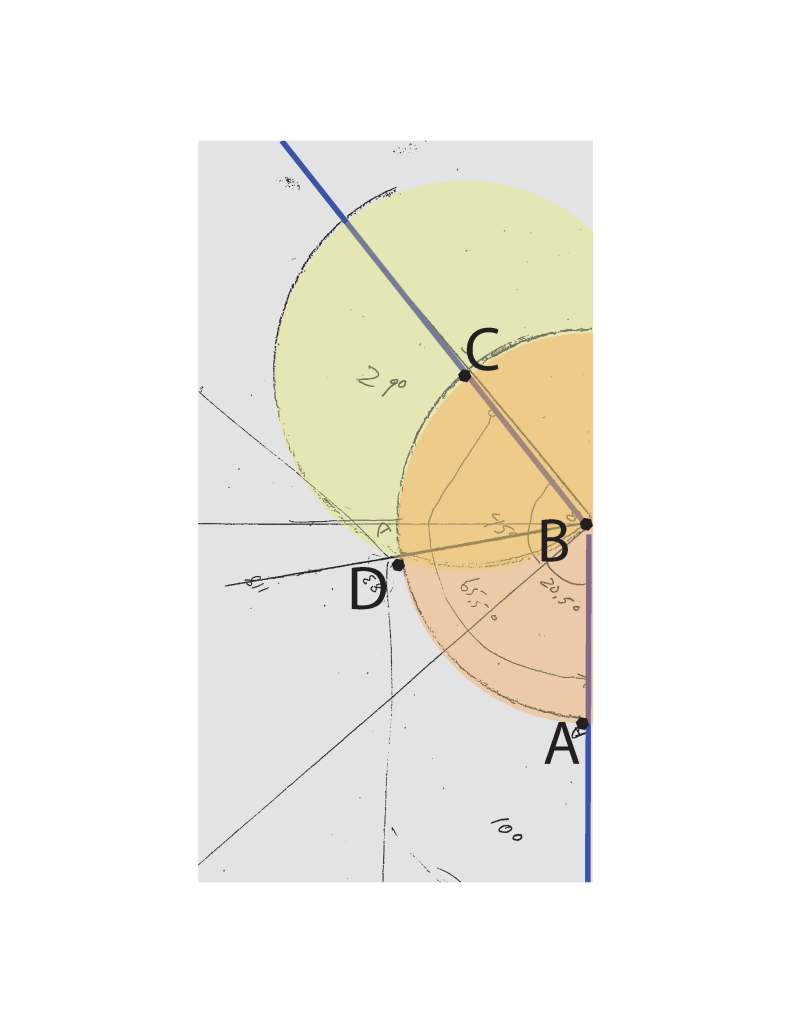
Using a compass and protractor (and after trial and error) somehow, and I honestly do not know how!, we measured the bevel on both sides to be 20.5 degrees.

We had cut a practice angle on scrap wood to give us a base platform for later handrail glueing…but though the ultimate angle matched our bevel measure the angle on each board was different. We wanted them at equal angles.
Somehow we came up with the 20.5 degree bevel. It worked.
A Better Way to Glue
Now with all the pieces cut we moved to the assembly phase. And here the Family Handyman article offered some very helpful guidance. In their words, “…a simple method to join the two with fast-setting epoxy.” As described we had cut scrap 2x4s on edge at the same angle as the rail and then we joined them with screws driven at an angle, per instructions.


Then, the new instruction for me, they suggested using very fast acting epoxy to join the pieces. As they state, “…the shallow angle makes it difficult to join the short and long stair railing sections with nails or screws. And dowels or other joining methods require a furniture maker’s precision.” So go with this glue. I got some JB Weld Minute Weld which set in 60 seconds!

First, ” to protect the wood from epoxy that may ooze out, wrap the rail ends with masking tape. Trim excess tape flush to the cut end with a sharp utility knife.” Then, per Family Handyman, “…support the rail sections with the 2x4s as you press and hold the joint together. With [60]-second epoxy, you’ll be able to hand-hold the joint together long enough for the epoxy to grab. Concentrate on keeping the profiles exactly lined up and pressing the rails tight together to eliminate gaps. “


“Then carefully remove the tape after the epoxy has set for five minutes…. leave the joint undisturbed for at least an hour. Overnight would be better, since the epoxy doesn’t approach maximum strength for at least 24 hours.”


All the pieces joined smoothly. The pieces joined so solidly together in those 60 seconds plus that I did not need to drill pilot holes nor add finishing nails to keep them together…. I am planning to use the minute weld approach for a lot more of what we do.
Test Handrail Mounting
Now I brought the finished handrail up to make sure it fit and to screw it onto the brackets
It did fit. I used vices and cloth to hold the handrail as I drilled pilot holes and then screwed the bracket “straps” into the rail.

Finish Sanding and Painting
With everything fitting and drilled, I now took it down to finish sand and paint.
Our Hingham Lumber paint advisor insisted we start on bare wood with a primer coat of oil primer …

…and them follow with the latex white paint.


We did

It worked…And on remounting, the painted hand rail looks great, fits, works well and adds a huge measure of safety.

Thanks to all the helpers. It took a village.
